OpenLDAP Server
For this manual we will use Ubuntu 20.04 LTS for both servers.
In OpenLDAP there is two type of servers;
- Provider
LDAP Server thet provide content DIT and make them avilable for retrieval by Consumer
- Consumer
LDAP Server/Client that make a request content update to Provider or other Consumer.
Planning
A Provider server must have a pubblic ip or port-forwarding because it need be contacted from Consumer servers.
The slapd configuration of Consumer server mapped the FQDN in cn=config,
best practice is put it the FQDN rather than utilize IP address.
FQDN is necessary also for TLS Certificates.
IP Address |
Name |
|---|---|
|
|
|
|
Now it’s time to chose the LDAP directory tree.
For this tutorial we will use: dc=oneos,dc=it.
Scenario
We need to have an ldap tree for authenticate and authorize users to login in some applications.
Users are in different workplaces across the world.
Above there is LDAP directory tree. In the subtree Membership there is a list of users created dinamically
with a user attirbute ou=Rome, to make this we will use the LDAP schema dyngroup.
Other branch is Groups, each user can be a member of one or more groups.
| dc=oneos,dc=it
| ├── cn=admin
| ├── ou=Membership
| |   ├── cn=Rome
| |   ├── cn=New York
| |   └── cn=Shangay
| ├── ou=People
| |   ├── uid=federico.fiordoliva
| |   ├── uid=mark.smith
| |   └── uid=meilin.wang
| └── ou=Groups
|     ├── uid=Adminstration
|     ├── uid=Sales
|     ├── uid=Ict
Lets assume we have an application that need to read ldap for authentication and authorization.
For authentication we will use uid and password attributes, for authorizations we want to have
an attribute for each applications with value TRUE if the user is authorize to use it.
In our personal schema we will have two attributes:
- app1:
TRUE/BLANK
- app2:
TRUE/BLANK
Installation Basics
Install the necessary packages on Ubuntu 20.04.
Ubuntu have a tool named dpkg-reconfigure than is run during package installation.
This tool helping to make a first configuration for some packages, slapd is one of this.
1user@ldap-provider:~$ sudo apt update
2user@ldap-provider:~$ sudo apt upgrade
3user@ldap-provider:~$ sudo apt install slapd ldap-utils
During installation the tool dpkg-reconfigure ask you to insert a password for
ldap super user admin and create a default dn as cn=admin,dc=example,dc=org.
Enable slapd to start at boot.
user@ldap-provider:~$ sudo systemctl enable slapd
Initial Configurations
Edit the ldap configuration file as above.
 1#
 2# LDAP Defaults
 3#
 4
 5# See ldap.conf(5) for details
 6# This file should be world readable but not world writable.
 7
 8BASE  dc=oneos,dc=it
 9URI   ldap://ldap-provider.onesos.it ldap://ldap-provider.oneos.it:636
10
11#SIZELIMIT    12
12#TIMELIMIT    15
13#DEREF                never
14
15# TLS certificates (needed for GnuTLS)
16TLS_CACERT    /etc/ssl/certs/ca-certificates.crt
Now we can use dpkg-reconfigure tool for crate our LDAP directory tree.
The first type need to be converted prior to load. dpkg-reconfigure slapd
Check the initial configuration by an ldap search command.
 1user@ldap-provider:~$ sudo ldapsearch -D "cn=admin,dc=oneos,dc=it" /
 2> -x -b "dc=oneos,dc=it" -W -h localhost
 3Enter LDAP Password:
 4# extended LDIF
 5#
 6# LDAPv3
 7# base <dc=oneos,dc=it> with scope subtree
 8# filter: (objectclass=*)
 9# requesting: ALL
10#
11
12# oneos.it
13dn: dc=oneos,dc=it
14objectClass: top
15objectClass: dcObject
16objectClass: organization
17o: oneos
18dc: oneos
19
20# admin, oneos.it
21dn: cn=admin,dc=oneos,dc=it
22objectClass: simpleSecurityObject
23objectClass: organizationalRole
24cn: admin
25description: LDAP administrator
26userPassword:: e1UMSEF9Y2paL7ZXL0EyfmtUVnhsZEpIMittK3IxTXdieTRsYTe=
27
28# search result
29search: 2
30result: 0 Success
31
32# numResponses: 3
33# numEntries: 2
LDAP Schema
The schemas used by slapd may be extended to support additional syntaxes, matching rules, attribute types, and object classes.
There are some schema in default OpenLDAP installation, we can load it and we can create our schema.
Make our schema
In this tutorial we need to create a schema for add some attributes not present in every schema.
For make a schema we need 2 arguments: olcAttributeTypes and olcObjectClasses.
The first one describe the attriubutes type, and the second one define the object class then contain this attributes.
Each argument need a globally unique OID, assigned by IANA.
LDAP have his starter OID: 1.3.6.1.4.1, the next number (PEN) identify a unique organization like 1.3.6.1.4.1.2, where 2 is assigned to IBM.
After organization identifier it’s possible to assign number for create our LDAP object.
At this link there is all assigned OID by IANA; https://www.iana.org/assignments/enterprise-numbers/enterprise-numbers.
It’s possible to have our OID by requesting it for free at this link; https://pen.iana.org/pen/PenApplication.page.
For this tutorial we use a PEN not assigned like 220776.
Create a file named /etc/ldap/schema/oneos-schema.ldif.
 1dn: cn=oneos,cn=schema,cn=config
 2objectClass: olcSchemaConfig
 3cn: oneos
 4olcAttributeTypes: ( 1.3.6.1.4.1.220776.1.90
 5  NAME 'app1'
 6  EQUALITY caseIgnoreMatch
 7  SUBSTR caseIgnoreSubstringsMatch
 8  SYNTAX 1.3.6.1.4.1.1466.115.121.1.15 )
 9olcAttributeTypes: ( 1.3.6.1.4.1.220776.1.91
10  NAME 'app2'
11  EQUALITY caseIgnoreMatch
12  SUBSTR caseIgnoreSubstringsMatch
13  SYNTAX 1.3.6.1.4.1.1466.115.121.1.15 )
14olcObjectClasses: ( 1.3.6.1.4.1.220776.1.100 NAME 'oneos'
15  MUST ( app1 $ app2 ) )
Attention
Pay attention to the indentations, otherwise the loading will fail!
Load Schema
In /etc/ldap/schema directory there are some schema files, usually:
core.ldifinetorgperson.ldifnis.ldifcosine.ldif
and so.
This schema are loaded by default. For this tutorial we need to load dyngroup.ldif schema.
This schema permit to create a dynamic lists of user.
Schema file have two type of syntax, schema and ldif. Ubuntu have both file in schema directory.
The first type need to be converted prior to load, for this there is a tool named schem2ldif.
In Ubuntu you can install it by user@ldap-provider:~$ sudo apt install schema2ldif.
To check which schemas are loaded type this.
user@ldap-provider:~$ sudo ldap-schema-manager -l
core
cosine
nis
inetorgperson
In this tutorial we will load only schema file in ldif format.
For loading this file use the utility ldapadd.
user@ldap-provider:~$ sudo ldapadd -Q -Y EXTERNAL -H ldapi:/// /
> -f /etc/ldap/schema/oneos-schema.ldif
adding new entry "cn=oneos,cn=schema,cn=config"
user@ldap-provider:~$ sudo ldapadd -Q -Y EXTERNAL -H ldapi:/// /
> -f /etc/ldap/schema/dyngroup.ldif
adding new entry "cn=dyngroup,cn=schema,cn=config"
To check if schema was loaded.
user@ldap-provider:~$ sudo ldap-schema-manager -l
core
cosine
nis
inetorgperson
oneos
dyngroup
dyngroup module need to be activated, create a file dynlist.ldif.
 1dn: cn=module,cn=config
 2cn: module
 3objectClass: olcModuleList
 4olcModuleLoad: dynlist.la
 5olcModulePath: /usr/lib/ldap
 6
 7dn: olcOverlay=dynlist,olcDatabase={1}mdb,cn=config
 8objectClass: olcOverlayConfig
 9objectClass: olcDynamicList
10olcOverlay: dynlist
11olcDlAttrSet: groupOfURLs memberURL uniqueMember
Load it.
user@ldap-provider:~$ sudo ldapadd -Q -Y EXTERNAL -H ldapi:/// /
> -f /etc/ldap/dynlist.ldif
adding new entry "cn=module,cn=config"

adding new entry "olcOverlay=dynlist,olcDatabase={1}mdb,cn=config"
Web GUI
OpenLDAP have some third parts web gui, we will use phpLdapAdmin.
To install it on Ubuntu 20.04 make this command.
user@ldap-provider:~$ sudo apt install phpldapadmin
To make phpLdapAdmin available we need to make some configurations.
Open the file /etc/phpldapadmin/config.php and change the values like this.
1$servers->setValue('server','name','OneOS Ldap Server');
2$servers->setValue('server','base',array('dc=oneos,dc=it'));
After you make installation go to http://ldap-provider.oneos.it/phpldapadmin.
Insert correct dn, password and click Authenticate.
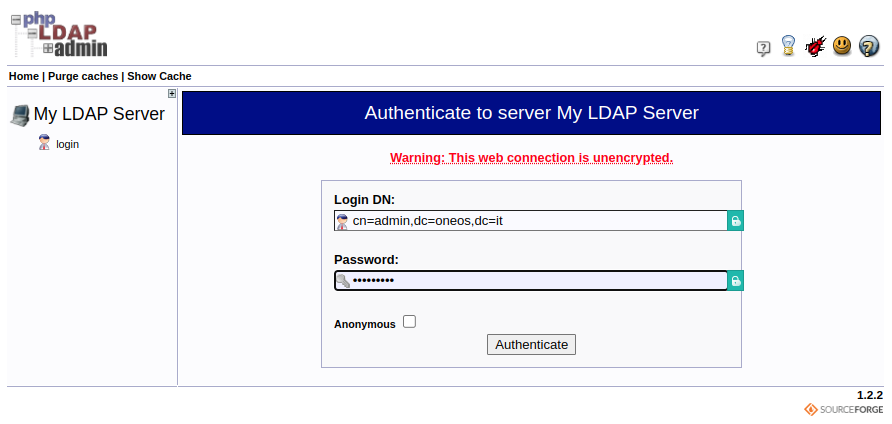
phpLdapAdmin Login Form

phpLdapAdmin Login Home Page
In the directory there is olny the basic information provided by the tool dpkg-reconfigure slapd, now ww must populate
with our tree planned.
Populate LDAP Directory
Load content in LDAP is simple and fast. We create a file for every brunch of tree.
Create a file called /etc/ldap/ou.ldif.
 1dn: ou=People,dc=oneos,dc=it
 2objectClass: organizationalUnit
 3objectClass: top
 4ou: People
 5
 6dn: ou=Membership,dc=oneos,dc=it
 7objectClass: organizationalUnit
 8objectClass: top
 9ou: Membership
10
11dn: ou=Groups,dc=oneos,dc=it
12objectClass: organizationalUnit
13objectClass: top
14ou: Groups
Load this file.
user@ldap-provider:~$ sudo ldapadd -x -D cn=admin,dc=oneos,dc=it -W /
> -f /etc/ldap/ou.ldif  -h localhost
Enter LDAP Password:
adding new entry "ou=People,dc=oneos,dc=it"

adding new entry "ou=Membership,dc=oneos,dc=it"

adding new entry "ou=Groups,dc=oneos,dc=it"
Now create a file /etc/ldap/membership.ldif.
 1dn: cn=Rome,ou=Membership,dc=oneos,dc=it
 2cn: Rome
 3memberURL: ldap:///ou=People,dc=oneos,dc=it?uid?sub?(ou=Rome)
 4objectClass: groupOfURLs
 5objectClass: top
 6
 7dn: cn=New York,ou=Membership,dc=oneos,dc=it
 8cn: New York
 9memberURL: ldap:///ou=People,dc=oneos,dc=it?uid?sub?(ou=New York)
10objectClass: groupOfURLs
11objectClass: top
12
13dn: cn=Shangai,ou=Membership,dc=oneos,dc=it
14cn: Shangai
15memberURL: ldap:///ou=People,dc=oneos,dc=it?uid?sub?(ou=Shangai)
16objectClass: groupOfURLs
17objectClass: top
Load this file.
user@ldap-provider:~$ sudo ldapadd -x -D cn=admin,dc=oneos,dc=it -W /
> -f /etc/ldap/membership.ldif  -h localhost
Enter LDAP Password:
adding new entry "cn=Rome,ou=Membership,dc=oneos,dc=it"

adding new entry "cn=New York,ou=Membership,dc=oneos,dc=it"

adding new entry "cn=Shangai,ou=Membership,dc=oneos,dc=it"
At this point we have two ou and two dinamic list of users.
Load users.|br|
Create a file called /etc/ldap/users.ldif.
 1dn: uid=federico.fiordoliva,ou=People,dc=oneos,dc=it
 2objectClass: top
 3objectClass: inetOrgPerson
 4objectClass: posixAccount
 5objectClass: shadowAccount
 6objectClass: extensibleObject
 7objectClass: person
 8o: oneos
 9ou: Rome
10sn: Wiz
11cn: federico.fiordoliva
12mail: federico.fiordoliva@oneos.it
13uid: federico.fiordoliva
14userPassword: {SSHA}EqMXhHPQAc0rirQIZLJi/pWz3mxZf/HD
15loginShell: /bin/bash
16uidNumber: 2001
17gidNumber: 3001
18homeDirectory: /home/federico.fiordoliva
19app1: True
20
21dn: uid=mark.smith,ou=People,dc=oneos,dc=it
22objectClass: top
23objectClass: inetOrgPerson
24objectClass: posixAccount
25objectClass: shadowAccount
26objectClass: extensibleObject
27objectClass: person
28o: oneos
29ou: New York
30sn: Wiz
31cn: mark.smith
32mail: mark.smith@oneos.it
33uid: mark.smith
34userPassword: {SSHA}EqMXhHPQAc0rirQIZLJi/pWz3mxZf/HD
35loginShell: /bin/bash
36uidNumber: 2002
37gidNumber: 3002
38homeDirectory: /home/mark.smith
39app2: True
40
41dn: uid=meilin.wang,ou=People,dc=oneos,dc=it
42objectClass: top
43objectClass: inetOrgPerson
44objectClass: posixAccount
45objectClass: shadowAccount
46objectClass: extensibleObject
47objectClass: person
48o: oneos
49ou: Shangai
50sn: Wiz
51cn: meilin.wang
52mail: meilin.wang@oneos.it
53uid: meilin.wang
54userPassword: {SSHA}EqMXhHPQAc0rirQIZLJi/pWz3mxZf/HD
55loginShell: /bin/bash
56uidNumber: 2003
57gidNumber: 3003
58homeDirectory: /home/meilin.wang
59app2: True
Load file.
user@ldap-provider:~$ sudo ldapadd -x -D cn=admin,dc=oneos,dc=it -W /
> -f /etc/ldap/users.ldif  -h localhost
Enter LDAP Password:
adding new entry "uid=federico.fiordoliva,ou=People,dc=oneos,dc=it"

adding new entry "uid=mark.smith,ou=People,dc=oneos,dc=it"

adding new entry "uid=meilin.wang,ou=People,dc=oneos,dc=it"
Now create a file /etc/ldap/groups.ldif.
 1dn: cn=Administration,ou=Groups,dc=oneos,dc=it
 2cn: Administration
 3objectClass: posixGroup
 4gidNumber: 3003
 5memberUid: mailin.wang
 6
 7dn: cn=Sales,ou=Groups,dc=oneos,dc=it
 8cn: Sales
 9objectClass: posixGroup
10gidNumber: 3002
11memberUid: mark.smith
12
13dn: cn=Ict,ou=Groups,dc=oneos,dc=it
14cn: Ict
15objectClass: posixGroup
16gidNumber: 3001
17memberUid: federico.fiordoliva
Load file.
user@ldap-provider:~$ sudo ldapadd -x -D cn=admin,dc=oneos,dc=it -W /
> -f /etc/ldap/groups.ldif -h localhost
Enter LDAP Password:
adding new entry "cn=Administration,ou=Groups,dc=oneos,dc=it"

adding new entry "cn=Sales,ou=Groups,dc=oneos,dc=it"

adding new entry "cn=Ict,ou=Groups,dc=oneos,dc=it"
Go to phpLdapAdmin and check the loading data.
Check users data and check if dynamic list is populate.|br|
Go to cn=Rome,ou=Membership,dc=oneos,dc=it.

phpLdapAdmin Dynlist
Check the attribute uniqueMember, the value was populate dinamically with entire dn of
user federico.fiordoliva.
If this user will relocate from Rome to New York, the user attribute ou need to be change with new value New York.
Securing OpenLDAP - TLS
To enable TLS we need one x509 certificate for Provider and one for each clients connection to OpenLDAP servers. Best practise is to obtain a valid certificate from a recognized CA, we will use Let’s Encrypt with ACME Protocol.
We need one fullchain certificate from Let’s Encrypt and two server certificate for Provider and Consumer servers.
You can learn how to obtain a Let’s Encrypt certificate on pfSense at this page: Let’s Encrypt on pfSense.
Note
If you have a certificates from standard CA you can bypass the Let’s Encrypt on pfSense tutorial.
After you obtain CA CHAIN file, your server certificate and your private key, you can configure OpenLDAP.
Put this files in /etc/ldap and adjust the ownership.
cacert.crtldap-provider.oneos.it.crtldap-provider.oneos.it.key
user@ldap-provider:~$ sudo chown openldap:openldap /etc/ldap/*
user@ldap-provider:~$ sudo chmod 640 /etc/ldap/cacert.crt
user@ldap-provider:~$ sudo chmod 640 /etc/ldap/ldap-provider*
Modify /etc/ldap/ldap.conf file by adding this entry.
TLS_CACERTDIR /etc/ldap
TLS_CACERT /etc/ldap/cacert.crt
TLS_REQCERT allow
Now restart slapd.
user@ldap-provider:~$ sudo systemctl restart slapd
Create a file called /etc/ldap/olcTLS.ldif.
 1dn: cn=config
 2changetype: modify
 3replace: olcTLSCACertificateFile
 4olcTLSCACertificateFile: /etc/ldap/cacert.crt
 5-
 6replace: olcTLSCertificateKeyFile
 7olcTLSCertificateKeyFile: /etc/ldap/ldap-provider.oneos.it.key
 8-
 9replace: olcTLSCertificateFile
10olcTLSCertificateFile: /etc/ldap/ldap-provider.oneos.it.crt
Load the file.
user@ldap-provider:~$ sudo ldapmodify -Y EXTERNAL -H ldapi:/// /
> -f /etc/ldap/olcTLS.ldif
SASL/EXTERNAL authentication started
SASL username: gidNumber=0+uidNumber=0,cn=peercred,cn=external,cn=auth
SASL SSF: 0
modifying entry "cn=config"
Check configuration loaded.
user@ldap-provider:~$ sudo slapcat -b "cn=config" |egrep "olcTLS"
olcTLSCACertificateFile: /etc/ldap/cacert.crt
olcTLSCertificateKeyFile: /etc/ldap/ldap-provider.oneos.it.key
olcTLSCertificateFile: /etc/ldap/ldap-provider.oneos.it.crt
Now we need to active ldaps on default config of slapd; /etc/default/slapd
SLAPD_SERVICES="ldap:/// ldapi:/// ldaps:///"
Restart slapd.
user@ldap-provider:~$ sudo systemctl restart slapd
Replica Configurations
In OpenLDAP, there are some type of replication topologies. We will use refreshAndPersist.
The connection was initiated by Consumer to Provider and all changes made on Provider will push on all Consumer servers.
Provider
Firts af all web need a user with read-only access to Provider, create it.
Make a file called replica-user.ldif.
1dn: cn=replicator,dc=oneos,dc=it
2objectClass: simpleSecurityObject
3objectClass: organizationalRole
4cn: replicator
5description: Replication user
6userPassword: {SSHA}x
Load file.
user@ldap-provider:~$ sudo ldapadd -x -D cn=admin,dc=oneos,dc=it -W /
> -f /etc/ldap/replica-user.ldif -h localhost
Enter LDAP Password:
adding new entry "cn=replicator,dc=oneos,dc=it"
Now add password for replicauser.
user@ldap-provider:~$ sudo ldappasswd -h localhost -x -D cn=admin,dc=oneos,dc=it /
> -W -S cn=replicator,dc=oneos,dc=it
New password:
Re-enter new password:
Enter LDAP Password:
After adding user, we need to change privilegs.
Create file called replica-acl.ldif
 1dn: olcDatabase={1}mdb,cn=config
 2changetype: modify
 3add: olcAccess
 4olcAccess: {0}to *
 5  by dn.exact="cn=replicator,dc=oneos,dc=it" read
 6  by * break
 7-
 8add: olcLimits
 9olcLimits: dn.exact="cn=replicator,dc=oneos,dc=it"
10  time.soft=unlimited time.hard=unlimited
11  size.soft=unlimited size.hard=unlimited
Attention
Pay attention to the indentations, otherwise the loading will fail!
Load file.
user@ldap-provider:~$ sudo ldapmodify -Q -Y EXTERNAL -H ldapi:/// -f replica-acl.ldif
modifying entry "olcDatabase={1}mdb,cn=config"
Now we can activate replica configurations.
Create file called provider-sync.ldif.
 1# Add indexes to the frontend db.
 2dn: olcDatabase={1}mdb,cn=config
 3changetype: modify
 4add: olcDbIndex
 5olcDbIndex: entryCSN eq
 6-
 7add: olcDbIndex
 8olcDbIndex: entryUUID eq
 9
10#Load the syncprov module.
11dn: cn=module{0},cn=config
12changetype: modify
13add: olcModuleLoad
14olcModuleLoad: syncprov
15
16# syncrepl Provider for primary db
17dn: olcOverlay=syncprov,olcDatabase={1}mdb,cn=config
18changetype: add
19objectClass: olcOverlayConfig
20objectClass: olcSyncProvConfig
21olcOverlay: syncprov
22olcSpCheckpoint: 100 10
23olcSpSessionLog: 1000
Load file.
user@ldap-provider:~$ sudo ldapmodify -Q -Y EXTERNAL -H ldapi:/// /
> -f /etc/ldap/provider-sync.ldif
modifying entry "olcDatabase={1}mdb,cn=config"

modifying entry "cn=module{0},cn=config"

adding new entry "olcOverlay=syncprov,olcDatabase={1}mdb,cn=config"
Consumer
Each Consumer need to be configured as Provider, follow the above step from Installation Basics to LDAP Schema and Securing OpenLDAP - TLS. Configure the FQDN of the Consumer as planned and obtain a new certificate for this name.
Create a file called cunsumer-sync.ldif.
 1dn: cn=module{0},cn=config
 2changetype: modify
 3add: olcModuleLoad
 4olcModuleLoad: syncprov
 5dn: olcDatabase={1}mdb,cn=config
 6changetype: modify
 7add: olcDbIndex
 8olcDbIndex: entryUUID eq
 9-
10add: olcSyncrepl
11olcSyncrepl: rid=0
12  provider=ldap://ldap-provider.oneos.it
13  bindmethod=simple
14  binddn="cn=replicator,dc=oneos,dc=it" credentials=PASSWORD
15  searchbase="dc=oneos,dc=it"
16  schemachecking=on
17  type=refreshAndPersist retry="60 +"
18  starttls=critical
19  tls_reqcert=demand
20-
21add: olcUpdateRef
22olcUpdateRef: ldap://ldap-provider.oneos.it
The row olcSyncrepl: rid=0 uniquely identifies this Consumer, if another Consumer will
configure the number of rid must be different.
Attention
Change PASSWORD with the correct password of cn=replicator.
Load file.
user@ldap-provider:~$ sudo ldapadd -Q -Y EXTERNAL -H ldapi:/// /
> -f /etc/ldap/consumer-sync.ldif
To check if the replica works simply do a slapcat command to see all directory content.
Verify TLS tansport
To check if TLS works as aspected we can make this test.
Stop
slapdon Consumer server.Make a change on Provider by adding a new user.
run
tcpdumpon Provider to record a connection with Consumer, run this command, put your network interface name inINTNAME.tcpdump -i INTNAME host ldap-consumer01.oneos.it -w ldap-capture.pcap
start
slapdservice on Consumer.stop the capture on Provider.
When open a pcap file with WireShark we will see than the connection use TLS 1.3 protocol.
This is the capture.
 1No. Time		Source		Destination	Protocol Length	Info
 21	0.000000	172.25.25.20	172.25.25.19	TCP	74	37816 → 389 [SYN] Seq=0 Win=64240 Len=0 MSS=1460 SACK_PERM=1 TSval=1450434539 TSecr=0 WS=128
 32	0.000052	172.25.25.19	172.25.25.20	TCP	74	389 → 37816 [SYN, ACK] Seq=0 Ack=1 Win=65160 Len=0 MSS=1460 SACK_PERM=1 TSval=3629846730 TSecr=1450434539 WS=128
 43	0.000224	172.25.25.20	172.25.25.19	TCP	66	37816 → 389 [ACK] Seq=1 Ack=1 Win=64256 Len=0 TSval=1450434540 TSecr=3629846730
 54	0.000332	172.25.25.20	172.25.25.19	LDAP	97	extendedReq(1) LDAP_START_TLS_OID
 65	0.000354	172.25.25.19	172.25.25.20	TCP	66	389 → 37816 [ACK] Seq=1 Ack=32 Win=65152 Len=0 TSval=3629846730 TSecr=1450434540
 76	0.001007	172.25.25.19	172.25.25.20	LDAP	80	extendedResp(1)
 87	0.001113	172.25.25.20	172.25.25.19	TCP	66	37816 → 389 [ACK] Seq=32 Ack=15 Win=64256 Len=0 TSval=1450434540 TSecr=3629846731
 98	0.002325	172.25.25.20	172.25.25.19	TLSv1.3	407	Client Hello
109	0.002334	172.25.25.19	172.25.25.20	TCP	66	389 → 37816 [ACK] Seq=15 Ack=373 Win=64896 Len=0 TSval=3629846732 TSecr=1450434542
1110	0.003272	172.25.25.19	172.25.25.20	TLSv1.3	194	Server Hello
1211	0.003308	172.25.25.19	172.25.25.20	TLSv1.3	72	Change Cipher Spec
1312	0.003373	172.25.25.20	172.25.25.19	TCP	66	37816 → 389 [ACK] Seq=373 Ack=143 Win=64128 Len=0 TSval=1450434543 TSecr=3629846733
1413	0.003438	172.25.25.20	172.25.25.19	TCP	66	37816 → 389 [ACK] Seq=373 Ack=149 Win=64128 Len=0 TSval=1450434543 TSecr=3629846733
1514	0.004190	172.25.25.20	172.25.25.19	TLSv1.3	72	Change Cipher Spec
1615	0.004198	172.25.25.19	172.25.25.20	TCP	66	389 → 37816 [ACK] Seq=149 Ack=379 Win=64896 Len=0 TSval=3629846734 TSecr=1450434544
1716	0.007475	172.25.25.19	172.25.25.20	TLSv1.3	100	Application Data
1817	0.007511	172.25.25.19	172.25.25.20	TLSv1.3	2746	Application Data
1918	0.007545	172.25.25.19	172.25.25.20	TLSv1.3	352	Application Data
2019	0.007581	172.25.25.19	172.25.25.20	TLSv1.3	140	Application Data
2120	0.007623	172.25.25.20	172.25.25.19	TCP	66	37816 → 389 [ACK] Seq=379 Ack=183 Win=64128 Len=0 TSval=1450434547 TSecr=3629846737
2221	0.007664	172.25.25.20	172.25.25.19	TCP	66	37816 → 389 [ACK] Seq=379 Ack=2863 Win=63360 Len=0 TSval=1450434547 TSecr=3629846737
2322	0.007674	172.25.25.20	172.25.25.19	TCP	66	37816 → 389 [ACK] Seq=379 Ack=3149 Win=63104 Len=0 TSval=1450434547 TSecr=3629846737
2423	0.007693	172.25.25.20	172.25.25.19	TCP	66	37816 → 389 [ACK] Seq=379 Ack=3223 Win=63104 Len=0 TSval=1450434547 TSecr=3629846737
2524	0.008570	172.25.25.20	172.25.25.19	TLSv1.3	140	Application Data
2625	0.008583	172.25.25.19	172.25.25.20	TCP	66	389 → 37816 [ACK] Seq=3223 Ack=453 Win=64896 Len=0 TSval=3629846738 TSecr=1450434548
2726	0.009524	172.25.25.20	172.25.25.19	TLSv1.3	139	Application Data
2827	0.009535	172.25.25.19	172.25.25.20	TCP	66	389 → 37816 [ACK] Seq=3223 Ack=526 Win=64896 Len=0 TSval=3629846739 TSecr=1450434549
2928	0.010086	172.25.25.19	172.25.25.20	TLSv1.3	102	Application Data
3029	0.010235	172.25.25.20	172.25.25.19	TCP	66	37816 → 389 [ACK] Seq=526 Ack=3259 Win=64128 Len=0 TSval=1450434550 TSecr=3629846740
3130	0.010882	172.25.25.20	172.25.25.19	TLSv1.3	272	Application Data
3231	0.010890	172.25.25.19	172.25.25.20	TCP	66	389 → 37816 [ACK] Seq=3259 Ack=732 Win=64768 Len=0 TSval=3629846740 TSecr=1450434550
3332	0.011155	172.25.25.19	172.25.25.20	TLSv1.3	125	Application Data
3433	0.011471	172.25.25.20	172.25.25.19	TCP	66	37816 → 389 [ACK] Seq=732 Ack=3318 Win=64128 Len=0 TSval=1450434551 TSecr=3629846741
Check in Consumer if there is a new user by slapcat.